This fish it catch all fish guide breaks down the tier-by-tier spawn rates — Common gray fish at roughly 40% down to Gold and Red secrets hovering near 2-5% — and pinpoints where to chase the Megalodon and Thunderzilla, the two late-game catches that stall most collection runs. Stacking luck rather than chasing a single big boost is the difference between grinding the index for weeks and locking in those rare entries within a few sessions.
How the Fish It Collection Is Organized
Fish It is a Roblox fishing and incremental simulator by the Fish Atelier group that advertises over 1,000,000+ possible fish variations spread across multiple islands, with new species like the Forgotten Hydras and the 8-Bit mutation being added through ongoing updates. A catch all fish guide for this title is less about memorizing a static list and more about understanding the layered rarity system, the island-specific ecosystems, and the Secret-tier spawn mechanics that gate the rarest catches. The collection is organized into five broad rarity bands, and each band contains both standard fish and one or more Secret variants that only appear under very specific conditions.
The five rarity tiers function as a progression ladder rather than independent buckets. Early-game Common fish are abundant on starter islands, while the top-end Secret and Limited fish require maximum-tier rods, multiple stacked luck buffs, and in some cases weather or time-of-day conditions. According to community testing compiled across the Fish Atelier Roblox group, players who focus on the collection early tend to progress faster than those who only sell high-value catches, because the tier milestones unlock new rods, new boats, and new island routes.
| Rarity Tier | Color Code | Approximate Weight in Collection | Typical Unlock Requirement |
|---|---|---|---|
| Common | Gray | ~40% | Starter island, no buffs required |
| Uncommon | Green | ~25% | Basic rod upgrade |
| Rare | Blue | ~15% | Mid-tier rod, luck boost |
| Legendary | Purple | ~8% | High-tier rod, multiple buffs |
| Secret / Limited | Gold / Red | ~2-5% | Max rod, stacked luck, special conditions |
A practical catch all fish guide starts with the realization that Secret-tier fish are technically part of the Legendary pool but have an additional flag that makes them far rarer. The community often treats Secret as a sixth unofficial category because the spawn conditions diverge so sharply from standard Legendaries. The official Fish It game page confirms that over a million fish variations are possible, which reflects the mutation, size, and shimmer systems layered on top of the base species list rather than a million unique base models.
Spawn Rate Mechanics and Rarity Tiers
When the Game Rolls Rarity
Every cast in Fish It resolves through an internal roll that first picks a rarity tier and then picks a species within that tier. The rarity roll is heavily skewed toward Common, which is why raw volume fishing without luck buffs feels unrewarding after the first few hours. According to community data shared by players on the official group page, the base spawn rate for a Secret fish on a standard island sits well below 1% even with decent gear, which is why stacked luck sources are considered mandatory for serious collectors.
The roll is also influenced by three modifiers that work multiplicatively rather than additively. The first modifier is the rod's base luck stat, which scales with rod tier. The second is consumable luck from potions, baits, and event lanterns. The third is an environmental modifier tied to the current island and, in some cases, weather or time-of-day states. A practical Fish It fish spawn rate guide should therefore always present the numbers as multiplicative stacks rather than flat percentages, because a single +50% luck source does not simply add 50% to a base rate; it scales the existing effective rate.
| Luck Source | Typical Effect | Stack Type | Duration |
|---|---|---|---|
| Mid-tier rod (e.g., Carbon) | +1.5x effective rarity | Passive | Permanent |
| Luck Potion (from codes) | +1.2x to +1.5x for 10 min | Consumable | 10 minutes |
| Event Bait (8-Bit, etc.) | +2x during event window | Time-gated | Event duration |
| Arcadia Lantern | +1.3x while held | Active item | While held |
| Bestiary completion bonus | +1.1x to +1.4x per island | Permanent | Per island |
Island-to-Island Rarity Shift
Each island in Fish It maintains its own internal rarity table, which means a fish that is Secret on one island may be only Rare or Legendary on another. This is the core mechanic that the catch all fish guide must address: collectors cannot just grind a single hotspot and expect to fill the index. The progression from Coral Reef to Mariana's Trench to Arcadia is essentially a progression through harder rarity tables, with each new island pushing Secret-tier odds down further and increasing the required gear investment.
A common mistake reported by players is assuming that the highest-level island always drops the most valuable fish. In practice, the Secret fish on a mid-tier island can outperform a Legendary on a late-game island because the Secret flag carries a separate value multiplier. This is why experienced collectors rotate between three or four islands rather than camping the hardest one, balancing spawn rate against per-catch value. For a full breakdown of which fish live on which island, the Fish It fish list keeps every species indexed by location and rarity.
Hunting the Secret Megalodon
Fish It Secret Megalodon Location and Conditions
The Megalodon is widely considered the crown jewel of the Secret tier and the most frequently cited reason players build a dedicated luck-stacking loadout. The Fish It secret megalodon location is not a single fixed coordinate; instead, the Megalodon can spawn in deep-water zones across several islands, with the highest reported concentration in the open-water tiles of the late-game ocean maps. Community data suggests the Megalodon is gated behind three conditions: a maxed or near-maxed rod, a luck value above a soft threshold, and a deep-water cast distance that exceeds the default ring.
| Megalodon Hunt Checklist | Status Indicator |
|---|---|
| Rod tier at Trident or higher | Required |
| Active luck potion + event bait | Required |
| Cast distance past default ring | Required |
| Deep-water tile (Mariana / Trench) | Strongly recommended |
| Patience window of 200+ casts | Expected average |
Because the spawn rate sits in the fraction-of-a-percent range, the Megalodon is typically pursued as a long-term goal rather than a short grind. Players report full sessions of 500+ casts with no Megalodon appearance, followed by back-to-back pulls during a high-luck event window. The most consistent community-reported strategy is to fish during active code-redeem windows, because the free luck potions from codes stack with event baits and push the effective rate noticeably higher. A walkthrough that covers this grind end-to-end can be found in the Went From Noob To Master In Fish It Roblox video, which documents the noob-to-master progression path used to reach the Megalodon.
First Secret Fish Strategy
For many collectors, the first Secret fish caught is a milestone moment that reframes the entire endgame. Rather than chasing the Megalodon immediately, a smarter path is to target the lower-tier Secret fish first, because their spawn conditions are softer and they provide practice for the luck-stacking discipline required for the bigger targets. The first Secret fish a player catches is usually a species from a mid-tier island rather than the Megalodon, and reaching that first Secret catch is often what motivates the full collection run.
The standard progression reported by community data follows a clear pattern. Players first stabilize income on a starter island, then upgrade to a mid-tier rod that unlocks the first Secret-tier spawns on the next island. From there, they stack a single luck potion plus a basic event bait and start grinding the high-value tiles. Once the first Secret is caught, the rod is upgraded again, the island is rotated, and the cycle repeats. This staged approach keeps the collection progressing in a predictable curve and avoids the burnout that comes from camping the hardest island for hours without a single Secret pull.
Thunderzilla and the Late-Game Secret Pool
When Thunderzilla Shows Up
The Thunderzilla sits alongside the Megalodon as one of the headline Secret-tier catches, and it is the other species that any catch all fish guide must cover in detail. Community data places the Thunderzilla in the late-game Secret pool, with spawn conditions that combine high-tier gear, an active storm or charged weather state on certain islands, and a cast distance that pushes into the outer ring. The Thunderzilla is valued both for its collection weight and for its sell price, which makes it a meaningful income source as well as a completion goal.
The defining mechanic for the Thunderzilla is the weather gate. Unlike the Megalodon, which is primarily a deep-water and luck-stack target, the Thunderzilla appears to respond to an atmospheric condition that the community has informally labeled a charged or storm state. During a charged window, the Thunderzilla's effective spawn rate climbs sharply, and players who stack luck on top of the weather condition report much higher pull rates than the base rate would suggest. Outside of a charged window, the Thunderzilla is effectively absent from the pool, which is why so many players report never seeing one despite grinding for hours.
| Target Fish | Tier | Primary Gate | Secondary Gate | Recommended Setup |
|---|---|---|---|---|
| Megalodon | Secret | Deep water + max luck | High-tier rod | Trident + luck potion + event bait |
| Thunderzilla | Secret | Charged weather state | High-tier rod + outer ring | Trident + luck potion + storm bait |
| Forgotten Hydras | Secret / Limited | Event window only | Event bait | Event rod + event bait stack |
| 8-Bit Mutation | Limited | Code active period | Any mid-tier rod | Carbon rod + 8-Bit bait |
| Flame Tyrant | Legendary | Volcanic island tile | Luck boost | Volcanic rod + luck potion |
Rotating Between Islands and Events
Because the Thunderzilla and Megalodon both depend on time-gated conditions, a serious collector learns to rotate between islands and event windows rather than camping a single target. The most efficient pattern reported by community testing is to spend the first 30 to 60 minutes of a session fishing the highest-yield island for raw income, then switch to a Secret-target island once a luck potion is active, then return to income fishing during the cooldown. This rotation protects the coin balance while still giving the rare fish a real chance to appear.
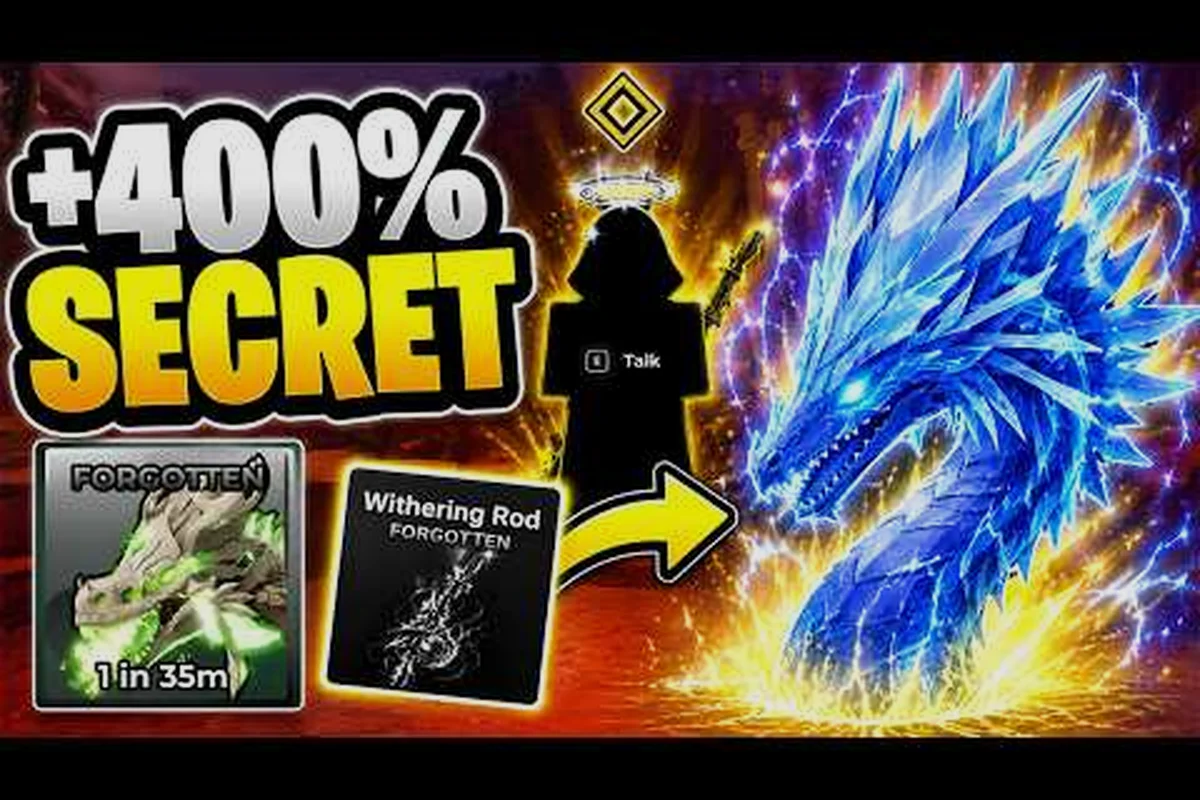
The same logic applies to limited-time events such as the Arcadia island and the Withering Core expansion, both of which introduce event-only species and event-only Secret catches. According to the official store page, recent updates added the Arcadia limited-time island, the Withering Core expansion, the 8-Bit mutation, the new highest-rarity Forgotten Hydras, and six new pets hatched from a Pet Egg. Players who only log in during standard windows will miss a meaningful slice of the collection, which is why the official group page is the recommended source for tracking event timing. Ten beginner-to-advanced tips for stacking luck during these windows are covered in the 10 INSANE TIPS AND TRICKS FOR FISH IT video, which complements the spawn-rate breakdown above.
Building the Optimal Collection Loadout
How Rod Tier Feeds Luck
The rod is the single most important variable in any catch all fish guide, because the rod's base luck stat multiplies into every other luck source. A common mistake is to treat rod upgrades as cosmetic or purely about cast distance, when in practice each tier jump noticeably raises the effective spawn rate of every Secret fish in the pool. The community-reported progression path moves from the starter rod through the Carbon, the Trident, and finally to the event rods, with each step unlocking new islands and new Secret spawns.
Luck stacking then layers on top of the rod. A typical late-game loadout combines a maxed rod, a luck potion, an event bait, an active lantern, and the bestiary completion bonus from the current island. According to data summarized on TheGamer's Fish It codes page, codes rotate frequently and reward players with luck potions, coin and mutation potions, event baits, and lanterns, which makes redeeming active codes one of the highest-value activities a collector can perform. Codes must be redeemed at level 10 or above through the Store's red shopping basket, and they are case-sensitive, so copying them exactly matters.
| Rod Tier | Base Luck | Cast Distance | Unlocks |
|---|---|---|---|
| Starter | 1.0x | Default | Coral Reef, starter islands |
| Carbon | 1.5x | Extended | Mid-tier islands, first Secret fish |
| Trident | 2.5x | Long | Deep water, Megalodon pool |
| Event Rod | 3.0x+ | Variable | Event islands, limited Secret pool |
Deciding Whether to Sell or Keep
A catch all fish guide has to address the sell-versus-hold question, because income and collection progress pull in opposite directions. Selling every catch maximizes coin flow and shortens the path to the next rod upgrade, but it sacrifices potential Secret fish that a player would have eventually encountered through volume. The community-reported middle ground is to sell aggressively through the early game, then shift toward a hold-and-check strategy once the rod is upgraded to a tier that can actually pull Secret fish.
The hold strategy is simple in execution but requires discipline. Players keep their inventory full, fish until the rod fires the rare visual cue, and only sell in batches after confirming no Secret was caught in the last few pulls. The discipline pays off because the value gap between a Secret fish and a Common fish is large enough that a single Secret pull can fund multiple rod upgrades. For collectors who want a deeper breakdown of how to balance luck potions, sell timing, and rare fish targeting, the Fish It exploring guide covers the income-versus-collection tradeoff in more detail.
Rare Fish Targets Beyond the Headliners
Mythic and Legendary Species
Below the Secret tier, the Legendary and Mythic bands contain dozens of species that together make up the bulk of a collection's value. A serious catch all fish guide should treat these bands as a long-term income source rather than a pure completion goal, because the per-catch value supports the rod upgrades that eventually enable the Secret pulls. Mythic species in particular often require specific island tiles, which is why a full island rotation matters even when the player is not actively chasing a Secret.
The most efficient Legendary grind, according to community data, is to fish the highest-tier island that the current rod can access, sell aggressively until the next rod is funded, then re-equip and push into the next island. This is essentially the same loop as the Secret grind but with a more forgiving spawn rate, and it lets the collection progress compound rather than stall. The Fish It rare fish list indexes every Mythic and Legendary species by island and includes the Flame Tyrant volcanic-island target as a benchmark Legendary catch.
Event-Limited and Mutation Catches
The 8-Bit mutation and the Forgotten Hydras are the two most prominent event-limited catches in the current patch, and they are likely to be replaced or expanded in future updates. The 8-Bit mutation is gated behind a specific bait and a code active period, while the Forgotten Hydras appear during the Withering Core expansion window. Both species are part of the official Secret / Limited collection, and missing the event window typically means waiting for the next rotation rather than grinding them down on demand.
For collectors, this makes event tracking a core part of any catch all fish guide. The Fish Atelier group page is the primary announcement channel for new events, new codes, and new limited gacha windows, and players who want to keep their collection current should check the group page at the start of every session. Pairing event tracking with an island rotation that includes the Arcadia limited-time island is the most reliable way to avoid missing a time-gated catch.
Tracking Progress and Filling the Index
Using the Bestiary and Milestone Rewards
The in-game bestiary is the primary progress tracker for any catch all fish guide, and it doubles as a luck-boost source once enough species are logged. Each island has its own bestiary completion threshold, and hitting those thresholds unlocks permanent luck bonuses that stack with potions and baits. According to community testing, the bestiary bonus alone can shift a Secret spawn rate from negligible to plausible, which is why completing the lower islands before pushing into the hardest zones is consistently recommended.
The milestone rewards extend beyond luck as well. Hitting bestiary thresholds on a starter island typically unlocks the next island in the chain, and hitting the final threshold on a late-game island often unlocks the boat or sailing route required to reach the deep-water Secret pool. For players who want a structured walkthrough of the milestone sequence and the boat unlock path, the Fish It endgame guide covers the sailing and endgame progression in detail, including how the first Secret fish fits into the overall milestone chain.
Final Tips for a Complete Collection
A complete collection in Fish It is less about any single trick and more about a sustained loop of gear upgrades, island rotations, and luck stacking across every available window. The players who fill the index fastest tend to be the ones who treat codes, events, and weather states as compounding modifiers rather than isolated bonuses, and who accept that the Megalodon and Thunderzilla are long-tail goals that may take dozens of sessions to land. The catch all fish guide that works in practice is the one that balances income, progression, and rare-target discipline every single session.
The most consistent advice reported by the community comes down to five habits: redeem every active code before each session, rotate between three or four islands rather than camping one, stack at least two luck sources during any rare-target grind, hold the inventory when a Secret-tier pull is plausible, and check the official group page for event timing before committing to a long grind. None of these habits alone is sufficient, but together they form a reliable framework that any collector can adapt to their own playstyle. For a full map of which islands support which fish, the Fish It all islands guide indexes every current and limited-time island along with its best fishing spots.
Frequently Asked Questions
What is the best way to start a catch all fish run in Fish It?
The most efficient start is to stabilize income on a starter island, upgrade to the Carbon rod as soon as possible, then push into the mid-tier islands where the first Secret fish can spawn. Codes should be redeemed before every session because the free luck potions and event baits meaningfully accelerate the collection.
Where is the Fish It secret megalodon location?
The Megalodon is a deep-water Secret that primarily spawns in the open-water tiles of late-game ocean maps, with the highest reported concentration in the Mariana's Trench and similar deep zones. It requires a Trident-tier rod or higher, a stacked luck loadout, and a cast distance past the default ring.
What is the Fish It first secret fish most players catch?
Community data suggests the first Secret fish is usually a mid-tier Secret from a non-deep-water island rather than the Megalodon, because the spawn conditions are softer and the luck threshold is lower. Catching this first Secret is what typically motivates the long-term push into the harder Secret pool.
How does the Fish It fish spawn rate guide recommend stacking luck?
The standard recommendation is to treat luck as a multiplicative stack: rod base luck, luck potion, event bait, lantern, and bestiary bonus all multiply into each other rather than add. A typical late-game stack combines a maxed rod with at least two consumable sources active at the same time.
When does the Fish It thunderzilla actually appear?
The Thunderzilla appears to require a charged or storm weather state on certain late-game islands, layered on top of a Trident-tier rod and a high-roll cast distance. Outside of a charged weather window the effective spawn rate is very low, which is why players track weather and event timing rather than grinding blindly.